Part 3: Add a Blog Post
Now let's add a blog post. Click on Content in the top navigation, and you'll see all the content types available to you. Let's just make a quick blog post to start: a tutorial on how to sew a stuffed bunny.
Create a Post
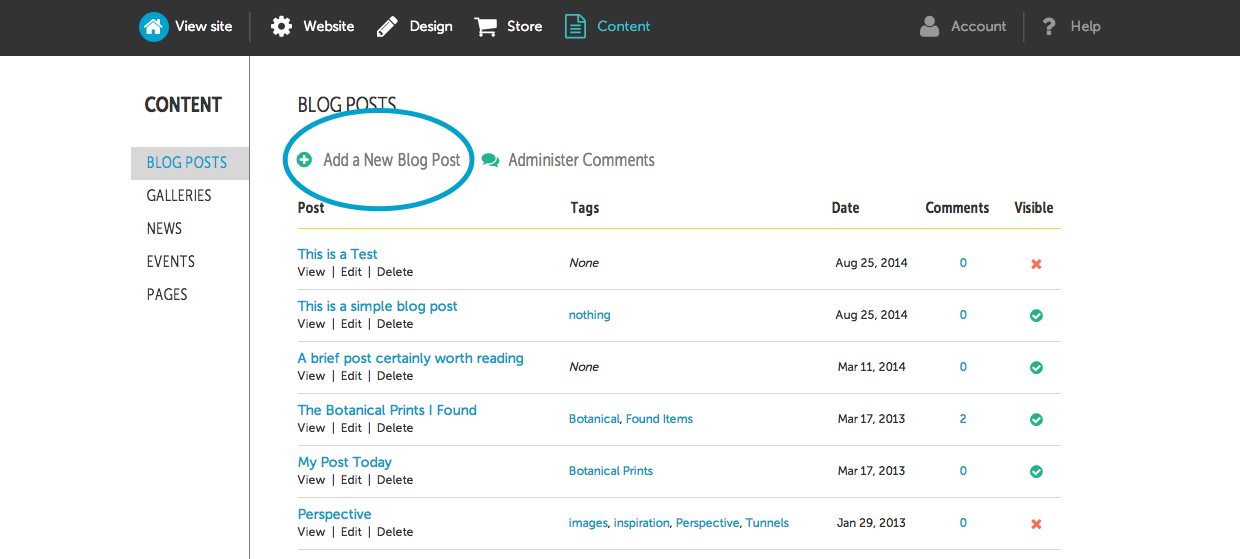
Click on Add a New Blog Post.

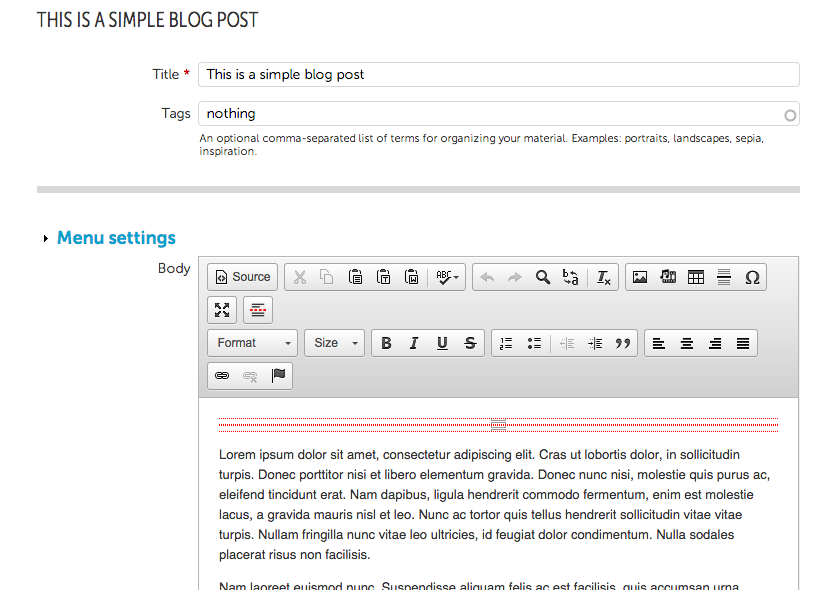
The create blog post form is pretty straightforward: give your post a title, optionally tag it, and then type the body of the post using the rich text editor.

The editor works just like any rich text editor. Type away, using the buttons to bold, headline, center, and so on.
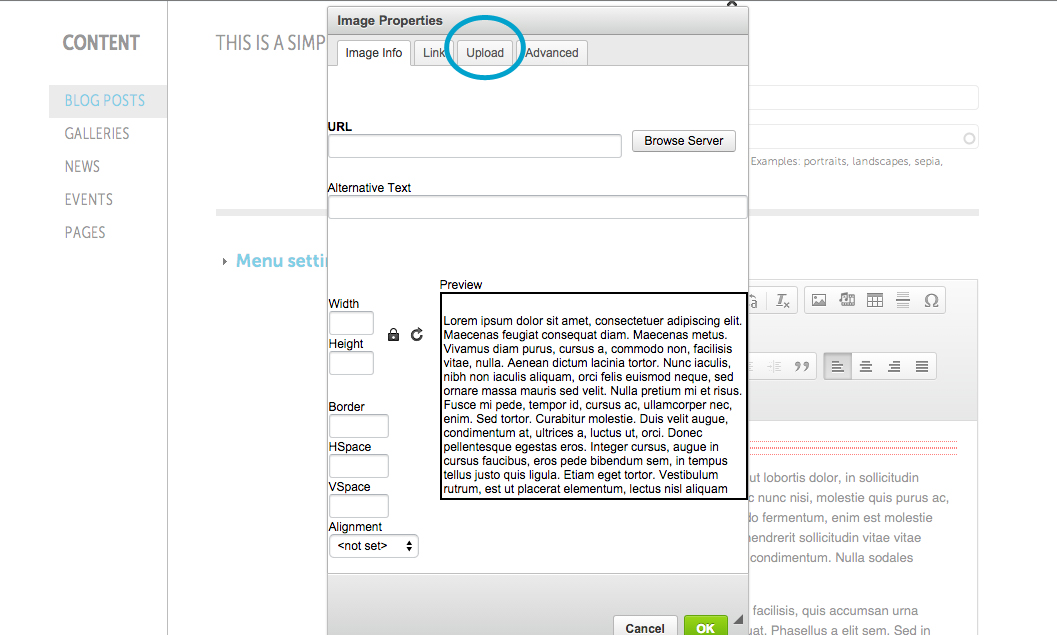
To add a photo to your post, push the button that looks like a painting, and choose the "upload" tab.

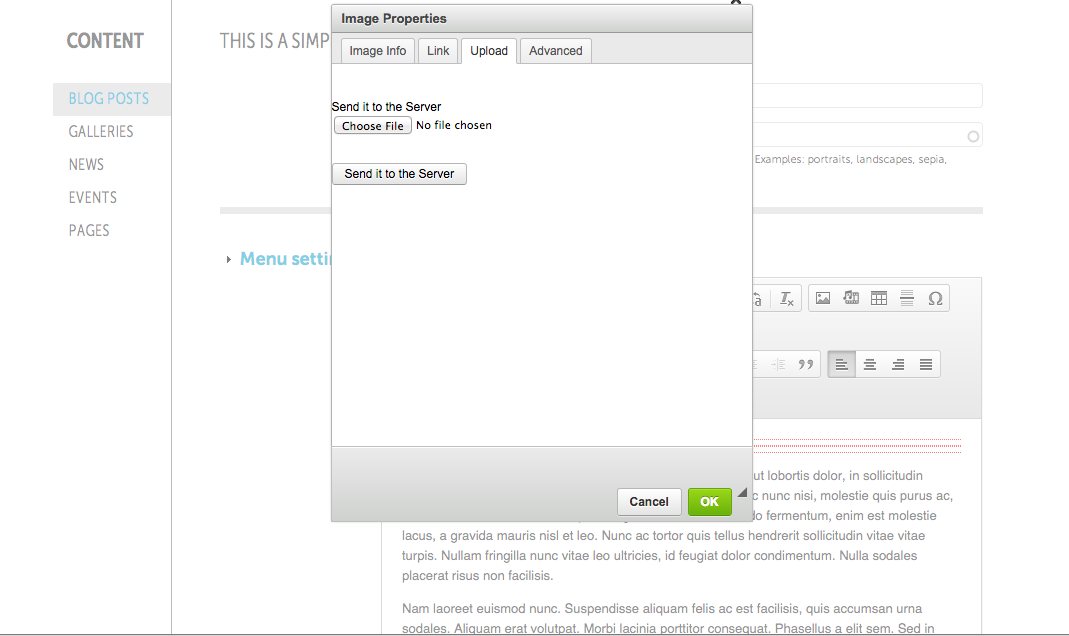
Your upload screen looks like this:

Push Choose File and then locate the image on your computer. Push Send it to the Server and it will be uploaded to your website automatically. Then just save your image by pushing "OK."
Next step...just waitin' for ya!